
Both settings apply from the next run on. Anyone in the workspace can see them; only workspace owners and admins can change them.
Residential proxy
Mini’s requests to the websites you list leave from a residential IP address in the country you pick. Every other request keeps the normal network.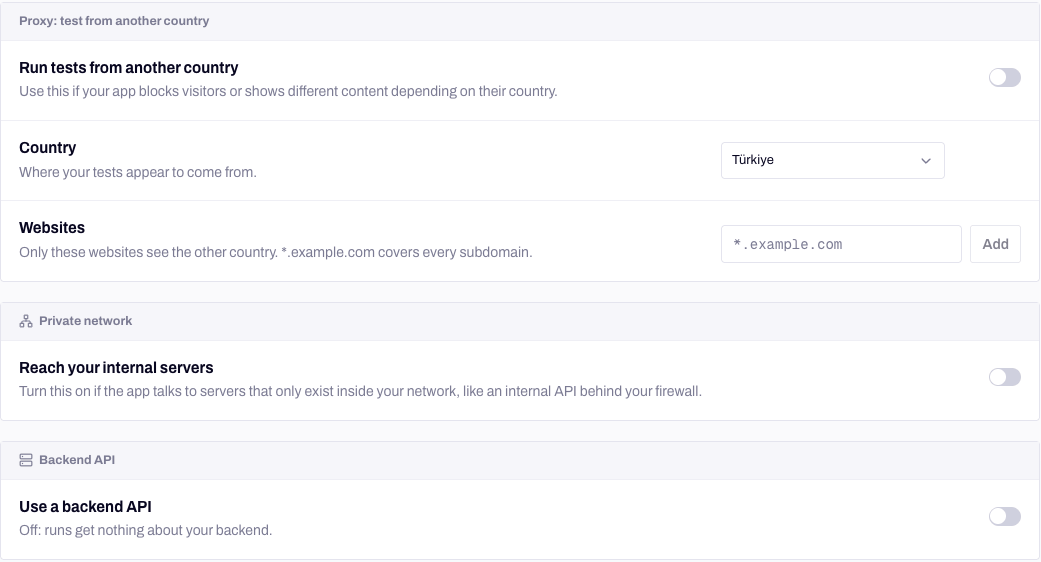
The network settings of an app.
1
Open the proxy settings
Open the app and go to App settings → General → Proxy: test from another country.
2
Pick the country
Turn on Run tests from another country and pick the Country your tests should appear to come from. You can pick from 199 countries.
3
List the websites
Under Websites, add the hostnames that should see the other country, like
api.example.com. *.example.com covers every subdomain.show returns the countries you can pick and how many domains the list accepts.
Private network
A connector is a small program you run on a machine inside your network. It opens one encrypted connection out to Minitap on port 443, so there’s no port to open and no firewall rule to add. During a run, requests to the domains you choose go through it, and everything else goes straight to the internet.Private network is part of the Enterprise plan and is turned on per workspace. Owners and admins see it under Settings → Private network once it’s on. If it isn’t there, contact the Minitap team.
1
Create a connector
A workspace owner or admin opens Settings → Private network and clicks Add connector. Give it a Name that says where it runs, and list the Domains it may reach, like
api.internal.example.com or *.internal.example.com.2
Install it inside your network
On a Mac or a Linux machine that can reach your internal servers, install the connector:Then run the install command the dashboard shows you. It holds the connector’s token, which is shown only once, so copy it before you close the dialog:The connector runs in the background and starts again after a reboot. The dashboard shows it online as soon as it connects.
3
Turn it on for an app
Open the app and go to App settings → General → Private network. Turn on Reach your internal servers, pick the Connector, and list the Internal domains the app needs. Each one must also be allowed on the connector’s machine.
What to expect
- You own the domain list.
--allowon the machine decides what the connector may reach, and it refuses anything else, whatever an app asks for. To change it, runsudo minitest-connector service install --allow '…'again on the machine; the token is kept. - Runs wait for the connector. A run that needs the connector starts only once the connector is online, so a stopped machine never shows up as failing tests. Nothing is billed until it’s back. To check the machine, run
minitest-connector service status. - On physical phones, every app on the phone reaches your internal domains through a VPN. If the app under test ships its own VPN, the phone falls back to a system proxy, and apps that ignore the proxy, such as most Flutter apps, can’t reach those domains. The run report shows which mode a phone used.
- Rotate or revoke a connector from its page in Settings → Private network. Revoking it disconnects its machines within seconds and switches off every app routed through it.
IP allowlist
If your firewall only lets known addresses through, ask the Minitap team for the IP addresses to allow. A private network connector is the other way in: it needs no firewall change at all.Staging password
Some staging sites ask for a username and password (HTTP basic auth) in a browser popup before the page loads. Mini can’t type into that popup, but it can open the site with the credentials in the address once; the browser then keeps the sign-in for the site. Add the staging username and password to the app’s Test suite → Knowledge, and Mini uses them before it opens your URL. See what Mini knows before it starts. Use a password that only guards staging: everyone in the workspace can read Mini’s memory. Your app’s own sign-in is a separate step: Mini signs in with the test accounts you attach.Next steps
Web apps
Point runs at a staging or preview URL.
Test accounts and sign-in
The users Mini signs in as, once it reaches your app.
Security
How Minitap handles your workspace’s data.