
Beta. In-app purchase testing is in beta. Purchases on physical phones need a phone set up for purchases, which you request from the In-app purchases page.
Where Mini can buy
Set it up in your app under Builds & test data → In-app purchases. The page shows each device type with its status, and each setup step says who does it (You, Minitap or Automatic) and whether it’s Done, To do or Waiting on Minitap. Only workspace owners and admins can set up in-app purchases.
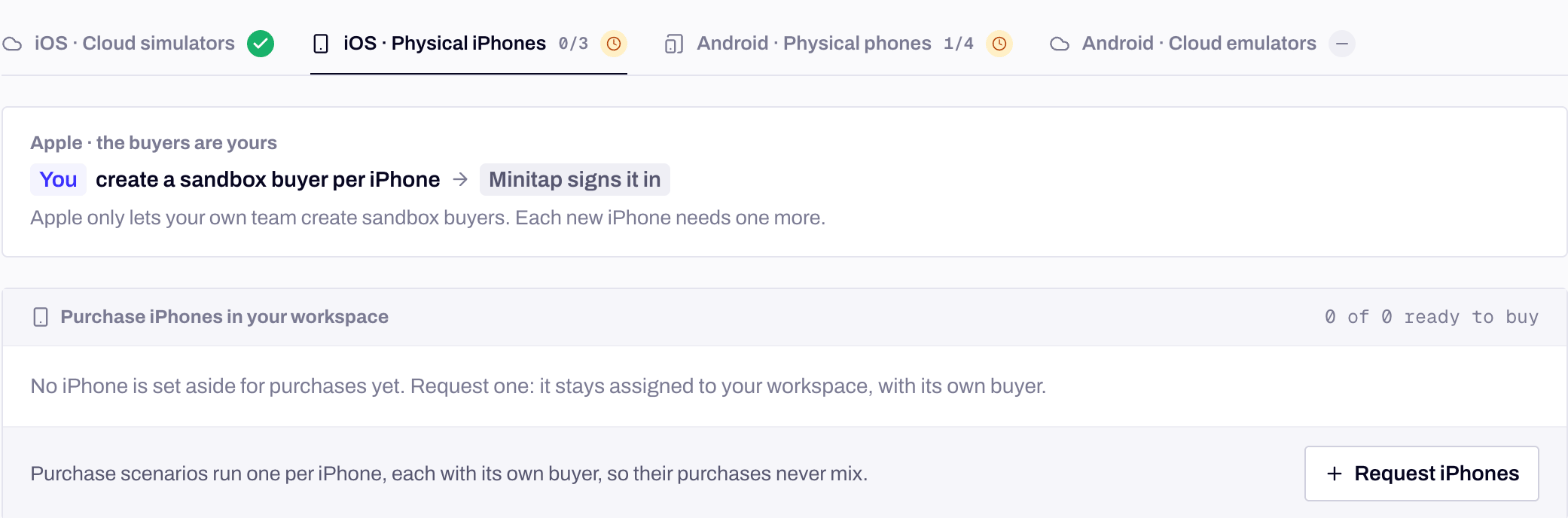
One tab per device type, each with what is left to set up.
iOS simulators
There is nothing to set up. Mini loads your App Store Connect products into a local StoreKit test store as the app starts, so purchases and subscriptions complete without charging anyone. Apps that use RevenueCat are covered too: purchases are recorded and entitlements are granted, as long as your RevenueCat app has its In-App Purchase key.Physical iPhones
You need an iPhone assigned to your workspace (see Devices). Then two steps, once per app.1
Let the iPhones install your app
Pick how your build reaches the iPhones. This also serves every physical iPhone run, purchases or not.
- TestFlight (recommended). Invite our Apple ID as a tester and paste the public link. New builds and new iPhones need nothing more from you.
- Ad Hoc or Development .ipa. Register our iPhones in your Apple Developer account (Copy UDID on each one), export the build for them and upload it. Every new build and every new iPhone means a new profile and a new upload. Minitap reads the profile and tells you which iPhones can install it.
2
Give each iPhone a Sandbox Apple Account
In App Store Connect, open Users and Access › Sandbox › Test Accounts and create one account per iPhone, in the team that owns your apps: a Sandbox Apple Account only buys in its own team’s apps. Use addresses nobody uses as a real Apple Account.Back in Minitap, click Add account and fill the Email, Password, Store country, the Apps it covers and the Device it goes on. Pick the same country as in App Store Connect: it sets the store, the currency and the prices Mini sees.
Physical Android phones
On Android, the buyers are ours. Minitap puts one Google account on each purchase phone, owned by Minitap and used only by your workspace. You list them in Play Console.1
Make our Google testers license testers
In Play Console, open Settings › License testing and create an email list named
Minitap buyers with the addresses Minitap shows (Copy the tester addresses). Tick the list, save, then click I added them. You do this once for your developer account, and it covers every app. Google shows these testers test cards, so nobody is charged.2
Let them install your app from Play
Open your app in Play Console, then Test and release › Internal testing › Testers, tick
Minitap buyers and save. Copy the link under How testers join your test and paste it in Minitap. Mini joins once on each phone. Internal testing needs no Google review, and the track only needs one release, any build.3
Upload your usual APK
Mini installs the APK you upload to Minitap, debug or release signed, as long as its package name matches the app in Play Console.
Purchase phones
Purchase scenarios run one per phone, each phone with its own buyer, so their purchases never mix. More phones means more purchase scenarios at once. To get more, click Request iPhones or Request Android phones, pick How many and add anything Minitap should know, like a model, an OS version or a deadline. Minitap reviews every request, usually within one business day, and assigns the phones to your workspace. Then:- iPhones: create one more Sandbox Apple Account per iPhone and add it here, about 2 minutes each. With TestFlight, the new iPhones install your app with no change on your side. With Ad Hoc builds, register the new UDIDs and upload a build signed for them.
- Android phones: add each new tester’s address to your
Minitap buyerslist, about 30 seconds. Your internal track already uses that list, so every app is covered.
Mark the scenarios that buy
Open a scenario that buys, subscribes or restores purchases, go to its Setup tab and turn on Tests in-app purchases under In-app purchases. Only those scenarios get a buyer. The others run anywhere, as before. From the CLI, pass--in-app-purchases on scenario create or scenario update, and --no-in-app-purchases to turn it off:
When a purchase scenario is skipped
On physical phones, a purchase scenario runs only on a phone set up to buy in your app. When none is ready, the scenario is skipped there instead of failing:- Physical iPhones: no iPhone carries a Sandbox Apple Account that covers this app, or the iPhone linked to the account is no longer assigned to your workspace. iOS simulators still run the scenario.
- Physical Android phones: Google Play purchases aren’t set up yet, the Google Play tester isn’t confirmed yet, or the phone holding the tester isn’t available.
Next steps
Devices
Cloud devices, phones assigned to your workspace, and when you need one.
Upload a build
The right file for each device, TestFlight links and Ad Hoc builds.
Secrets and test files
Test cards and passwords Mini types without seeing them.
Run tests
Pick scenarios, builds and devices for a run.